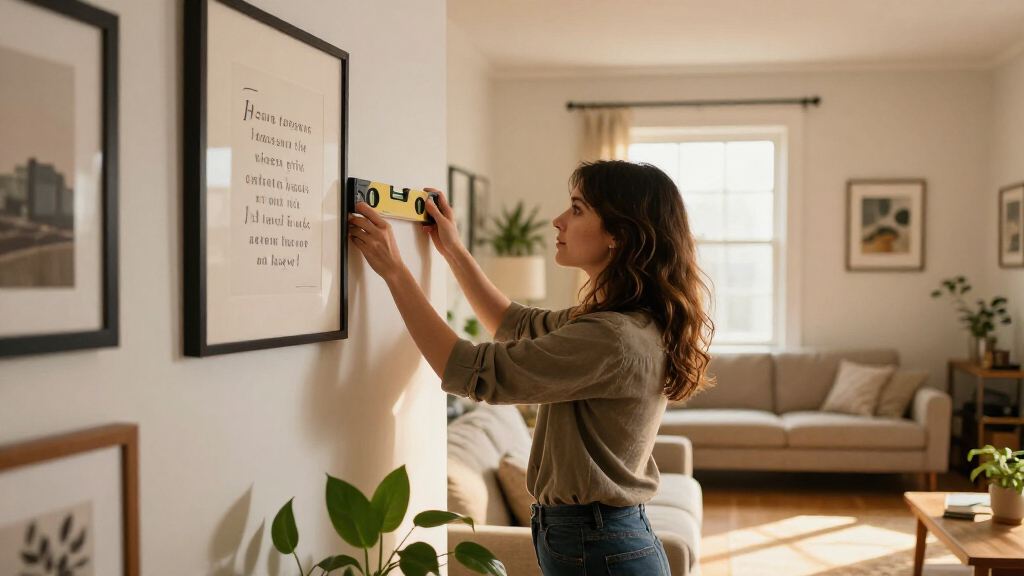

This guide walks you through creating your own motivational quote wall art from start to finish: choosing a quote, designing the layout, printing or hand-lettering it, framing it, and hanging it level on your wall. The finished result is a clean, gallery-style print you can hang in a home office, gym, bedroom, or entryway. This guide is written for complete beginners — no design training, art skills, or special equipment required. Expect to spend one to two hours of active work, plus an hour if you need to pick up a frame. By the end, you will have a framed quote print that reads clearly from across the room and stays straight on the wall.

Get the little things that make your day delivered free with Prime
- Fast, free delivery on millions of items
- Prime Video, Amazon Music and more included
- Member-only deals all year

DSHFG Motivational Inspirational Office Wall Art Decor Prints, Set of 4
- ✔ Quantity: Set of 4
- ✔ Size: 8 x 10 inches
- ✔ Frame Status: Unframed

Outus Inspirational Wall Art Prints, Set of 9, 8 x 10 Inches, Unframed
- ✔ Quantity: 9 prints
- ✔ Print Size: 8 x 10 inches
- ✔ Material: Laminated cardstock

The Man in the Arena Inspirational Framed Canvas Wall Art, 12 × 16 in
- ✔ Dimensions: 15.75 x 11.81 x 0.98 in (40 x 30 x 2.4 cm)
- ✔ Materials: Canvas, plastic, and wood
- ✔ Frame: Thin black frame
Difficulty: Beginner | Time: 1-2 hours (plus optional framing wait time)
What You’ll Need
Tools & Materials:
- Computer, tablet, or smartphone with internet access
- Free design tool such as Canva, Google Slides, or Adobe Express
- Printer and white cardstock (matte, 65–80 lb) — or access to a print shop
- Picture frame with mat board (8×10 frame with 5×7 mat is easiest for beginners)
- Ruler or tape measure
- Pencil
- Level (or a smartphone level app)
- Hammer and nail, or adhesive strips (e.g., Command strips) for renter-friendly hanging
- Optional: scissors or paper trimmer
Knowledge:
- Basic ability to type and format text in a simple app
- Ability to measure and mark a wall
Decide your print path before you start. Path A (recommended for beginners): design digitally and print. Path B: print or buy a blank template and hand-letter with a marker. This guide follows Path A but notes where Path B differs. Also decide your frame size first — common choices are 8×10 or 11×14 inches — because the frame determines the size you design and print at.
DSHFG Motivational Inspirational Office Wall Art Decor Prints, Set of 4
This four-print set earns our top spot because it nails the hardest part of quote wall art: typography that looks designed, not mass-produced. The modern black-and-white minimalist style reads as intentional decor in an office, dorm, or classroom, and it pairs cleanly with gallery frames in any color. Compared with the Outus set, you get fewer than half the prints, but the tighter curation works in your favor — four coordinated quotes create a cohesive grid, while nine prints can drift toward visual clutter on smaller walls.The tradeoff is the same one most unframed sets carry: frames are not included, so the true cost of display rises once you buy them. The monochrome palette is also a genuine limitation rather than a quibble — if your space leans warm, bohemian, or colorful, these prints will feel stark rather than inspiring. For anyone building a focused workspace aesthetic, though, this set makes the most sense as a foundation you can build around.
Pros:
- Minimalist black-and-white typography fits modern, monochrome, and minimalist interiors
- Set of 4 creates a coordinated gallery look without visual clutter
- Works across offices, dorms, classrooms, and home workspaces
- Makes a strong gift for students, coworkers, and graduates
Cons:
- Frames are not included, adding cost and effort
- Black-and-white only — limited for colorful or warm-toned rooms
Best for: Professionals, students, and graduates setting up a modern home office or dorm who want coordinated, frame-it-yourself prints
Not ideal for: Buyers who want something ready to hang out of the box, or whose decor calls for warm colors
Bottom line: The most versatile and design-forward pick here, provided you’re willing to frame the prints yourself.
“The most versatile and design-forward pick here, provided you’re willing to frame the prints yourself.”
Outus Inspirational Wall Art Prints, Set of 9, 8 x 10 Inches, Unframed
If the DSHFG set is about curation, the Outus set is about coverage. Nine landscape prints give you enough material to fill an entire accent wall, line a hallway, or split across multiple rooms — something neither competing pick can do. The inclusion of 40 adhesive dots is the real differentiator: unlike the DSHFG prints, these can go up immediately without frames, which matters if you’re decorating a rental, dorm, or classroom where drilling isn’t an option.The laminated cardstock is also more practical than plain paper prints — it resists handling damage and can be repositioned, which suits students who move annually. The compromise is finish: laminated cardstock with adhesive dots will never look as polished as the DSHFG prints behind glass, and it sits far below the framed Man in the Arena canvas in perceived quality. Treat this as a high-quantity, low-commitment option rather than a heirloom piece, and the value case is easy to make.
Pros:
- Nine prints cover a full wall or multiple rooms for one purchase
- 40 adhesive dots included for immediate, damage-free hanging
- Laminated cardstock is durable and reusable across moves
- Also fits standard 8 x 10 frames if you upgrade later
Cons:
- Frames are not included
- Adhesive-dot hanging looks less polished than framed display
- Landscape orientation limits some layout arrangements
Best for: Renters, teachers, and students who want maximum wall coverage and damage-free hanging on a tight budget
Not ideal for: Buyers seeking a refined, gallery-quality finish for a formal office or living room
Bottom line: The most prints and the easiest installation per dollar — ideal when volume and flexibility beat refinement.
“The most prints and the easiest installation per dollar — ideal when volume and flexibility beat refinement.”
The Man in the Arena Inspirational Framed Canvas Wall Art, 12 × 16 in
This Roosevelt-inspired canvas is the only option in our lineup that arrives as a finished, framed piece — and that changes who it’s for. Where the DSHFG and Outus sets demand framing decisions or adhesive work, this one is ready to hang or stand on a desk straight out of the box, thanks to its thin black frame and built-in backing plate. The waterproof canvas surface also makes it the most durable choice, suitable for kitchens, bathrooms, or humid climates where paper prints would warp.Its character is entirely different too: a single long-form quote functions as a statement piece, carrying one wall on its own, whereas the print sets create rhythm through repetition. The drawbacks are worth weighing honestly. The frame combines plastic and wood rather than solid wood throughout, which undercuts the premium feel at close range. And note that the actual dimensions are about 11.81 x 15.75 inches, slightly off from the 12 x 16 listed in the title — a small discrepancy, but one to check before measuring your wall space.
Pros:
- Arrives framed and ready to hang or stand on a desk
- Waterproof canvas holds up in humid environments
- Single powerful quote works as a standalone statement piece
- Thin black frame suits most room decor
Cons:
- Plastic and wood frame materials feel less premium than solid wood
- Actual size differs slightly from the listed 12 x 16 inches
- Only one quote — no variety across a wall
Best for: Home office owners and gift-givers who want one impactful, ready-to-display quote piece with zero framing effort
Not ideal for: Buyers on a budget, anyone wanting multiple quotes, or those who expect solid wood framing
Bottom line: The pick when you want one polished, hang-it-today centerpiece instead of a print collection.
“The pick when you want one polished, hang-it-today centerpiece instead of a print collection.”
As an Amazon Associate we earn from qualifying purchases.
Before You Start
Two decisions lock in everything else, so make them now. First, choose your frame size. An 8×10 frame with a mat opening of 5×7 inches is the most forgiving option: it hides minor print imperfections behind the mat and works in almost any room. Second, confirm your printing capability. Home printers handle 8.5×11 paper, which fits an 8×10 print with a trim. If you want an 11×14 print, plan for a print shop or online print service (usually $2–10 per print, same-day at most office supply stores). Do not design at one size and print at another — text placement shifts and letters can clip at the edges.
Avoid copyrighted material if you plan to sell or publicly share your art. Short quotes in a generic typeface are generally low risk for personal use, but song lyrics and long passages are not.
Step-by-Step Instructions
Step 1: Choose a short quote and verify the wording
Select one quote of roughly 2–10 words. Short quotes design well and stay readable from across a room. Write the quote out and double-check spelling, punctuation, and attribution against a reliable source. If you plan to add an attribution line (the author’s name), confirm the quote actually belongs to that person — many popular quotes are misattributed.
Tip: Longer quotes are not better wall art. If your quote runs past 15 words, cut it or choose a different one. You can break longer text across three or four short lines instead, but keep the total word count low.
Check: You have the exact final wording written down, verified, including capitalization and any attribution.
Step 2: Set up your design canvas at the correct print size
Open your design tool and create a custom-size project. Set the dimensions in inches to your exact print size (for example, 8×10 inches), not pixels. If the tool asks for resolution, choose 300 DPI for crisp printing. Set the background to white or a very light neutral unless you have a specific color scheme in mind.
Tip: In Canva, choose ‘Custom Size’, switch the unit dropdown from pixels to inches, then enter 8 x 10. Google Slides users should set the slide size under File > Page Setup.
Check: The canvas matches your frame’s print size exactly, and you can see the dimensions displayed in the tool.
Step 3: Lay out the quote with clear hierarchy
Type your quote and split it into two to four lines at natural phrase breaks. Pick a single typeface — a clean serif (like Playfair Display) or sans-serif (like Montserrat) reads best at wall distance. Emphasize the key word or phrase by setting it larger and bolder than the rest; this is your visual hierarchy. Center the text block horizontally and vertically on the canvas. Add an attribution line in small letters, all caps, with letter spacing if you want it.
Tip: Use only one or two typefaces total. Mixing three fonts is the fastest way to make a print look homemade. If in doubt, use one font in two weights (bold for the key phrase, regular for everything else).
Check: Stepping back from your screen, the main phrase is the first thing you notice and every word is legible without squinting.
Step 4: Leave a safe margin and check for edge clipping
Keep all text at least half an inch from every edge of the canvas. Zoom to 100% and inspect each line — look for letters touching the edge, words breaking awkwardly, or lines sitting too close together. Adjust line spacing to roughly 1.2–1.5 times the font size so lines of text don’t crowd each other.
Tip: If your frame has a mat, remember the mat covers about half an inch of the print on every side. A generous margin means your design survives any mat overlap.
Check: There is visible empty space on all four sides of your text and no letter touches the canvas edge at 100% zoom.
Step 5: Print on cardstock or send to a print shop
Export or download your design as a PDF at print quality. Load matte white cardstock into your printer and print at ‘Best’ quality with scaling set to 100% (not ‘Fit to page’). For 8×10 prints on 8.5×11 cardstock, trim the excess with scissors or a paper trimmer using the frame’s backing as a cutting guide. For 11×14 prints, send the PDF to a print shop and request matte cardstock or a matte poster print.
Tip: The ‘Fit to page’ printer setting is the most common cause of ruined prints — it shrinks the design and adds uneven white borders. Always choose ‘Actual size’ or 100%.
Check: The print comes out sharp with no banding lines, text is fully visible, and the trimmed print sits flat inside the frame opening without gaps.
Step 6: Assemble the frame
Lay the frame face-down on a flat, clean surface and remove the backing. Place the mat over your print, adjust the print until it is centered in the mat opening, then secure the backing. For a frame without a mat, center the print directly against the glass. Press or clip the backing closed and wipe the glass inside and out with a dry microfiber cloth before sealing, since fingerprints show under glass.
Tip: A tiny piece of removable tape on each back corner of the print holds it in place while you position it under the mat — much easier than re-centering after the backing is on.
Check: Held at arm’s length, the print is centered in the frame opening with equal visible margins on all sides, and no dust or fingerprints are trapped under the glass.
Step 7: Hang the frame level at the right height
Decide on placement: on a wall alone, the frame’s center should sit about 57–60 inches from the floor. If it hangs above a desk or furniture, leave 6–10 inches between the furniture top and the frame’s bottom edge. Mark the nail point with a pencil: measure the frame height, divide by two, add that to your chosen bottom-edge height, then subtract the distance from the frame’s hanging hardware to the frame’s top edge. Hammer in the nail (or apply adhesive strips per the package instructions), hang the frame, and check it with a level before pressing the strips firm.
Tip: Renter-friendly option: two adhesive strips placed at the upper corners of the frame keep it from tilting over time, which single-nail hangs often do.
Check: The bubble in the level sits between the center lines, and the quote reads comfortably from a normal standing or seated position in the room.
Common Mistakes to Avoid
- Printing with ‘Fit to page’ enabled, which shrinks the design and creates uneven borders. — Before printing, open printer settings and select ‘Actual size’ or set scaling to 100%. Always do one test print on plain paper first.
- Using thin printer paper, which wrinkles inside the frame and shows a gray tint behind the text. — Print on matte cardstock rated 65–80 lb. If you only have plain paper, a mat board will help hide the waves, but cardstock is worth the small cost.
- Crowding text against the canvas edges, so the mat covers part of a word. — Keep a minimum half-inch margin on all sides and check the design at actual size before printing.
- Using three or more fonts and multiple colors, producing a cluttered, amateur-looking print. — Stick to one or two typefaces and a two-color maximum — dark text on light background works in nearly every room.
Troubleshooting
Problem: The print looks blurry or pixelated when printed.
Solution: You exported at screen resolution or as a screenshot. Re-download the design as a PDF or PNG at 300 DPI, and print from the file directly rather than pasting it into a document.
Problem: Horizontal banding lines appear across the print.
Solution: Your print head is partially clogged or you are on a low-quality setting. Run your printer’s cleaning cycle, set quality to ‘Best’, and reprint. If banding persists, send the file to a print shop instead.
Problem: The print is slightly off-center behind the mat with uneven white margins.
Solution: Open the frame, place the mat over the print on a flat surface, and nudge the print until the margins match on all four sides. Tape the corners before replacing the backing so it cannot shift.
Problem: The frame keeps tilting after hanging.
Solution: Use a level to reposition, then secure the lower corners with removable adhesive strips rated for the frame’s weight.
What Success Looks Like
Your project is complete when all of the following are true: the quote is spelled correctly and reads clearly from at least six feet away; the print sits flat and centered inside the frame with even margins and nothing trapped under the glass; the frame hangs level (confirmed with a level, not by eye); and the center of the frame falls roughly at eye level for a standing person, or sits 6–10 inches above any furniture it accompanies. A final test: step back to the far side of the room. If the main phrase of the quote is instantly readable and the piece looks intentional — like it belongs on the wall — you did it right.
Next Steps
Once your first print is up, expand the concept: create two or three companion prints in the same typeface and frame style to form a gallery wall, spacing frames 2–3 inches apart. Reprint seasonal versions by changing only the quote and keeping the layout identical. If you designed in Canva, save your file as a template so future prints take ten minutes instead of an hour. For a more finished look later, order a larger archival print on cotton rag paper from an online print service using the same PDF. And if you find yourself making these regularly, research basic licensing rules before selling or gifting quote art commercially.
Frequently Asked Questions
What frame size is best for a beginner’s first quote print?
Start with an 8×10 inch frame that includes a 5×7 mat opening. The mat hides minor trimming errors and edge margins, the size fits standard home printers with one cut, and 8×10 frames are inexpensive and available everywhere. Move up to 11×14 once you are comfortable with the process.
Can I make quote wall art without a printer?
Yes. Email your PDF to a drugstore, office supply store, or online print service and pick up a matte cardstock print for a few dollars, usually same-day. Alternatively, print a blank template with faint guide lines and hand-letter the quote with a fine-tip marker, then frame it the same way.
Is it legal to print and sell quote wall art?
For personal use, short quotes are generally fine. For selling, the rules tighten: avoid song lyrics, long passages, and quotes from living authors, and note that many famous quotes are misattributed anyway. Generic phrases you write yourself carry no legal risk. If you plan a commercial shop, review copyright basics for quotations first.
What font size should I use so the quote is readable from across the room?
For an 8×10 print viewed from 6–10 feet, set your main phrase at roughly 60–100 points and supporting text at 18–30 points. The practical test is zooming your design to about 20% on screen — if the key phrase is still readable at that zoom, it will read on the wall.
How do I hang the art without damaging the wall in a rental?
Use adhesive hanging strips rated for your frame’s weight — typically two at the top and one or two at the bottom corners. Clean the wall with rubbing alcohol first, press each strip for 30 seconds, and wait a full hour before hanging. The bottom-corner strips also keep the frame perfectly level over time.
Columbus Day / Indigenous Peoples' Day Picks
long weekend sales
As an affiliate, we earn on qualifying purchases.